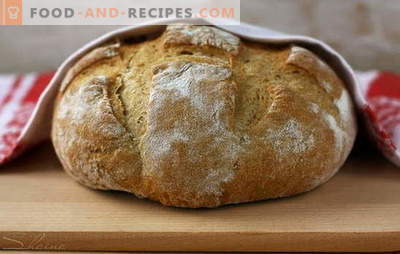
It is possible to save time by buying a hot loaf of bread, on the way home, but, well, saving time on health and a slim figure is not a good idea. Try to spend a month with fresh homemade bread, choosing one of the most simple step-by-step recipes for its preparation, and you no longer want to go after him to the bakery.
Step-by-step recipes for homemade bread - the basic technological principles
In order for the dough to always succeed, it is important to remember once and for all those biochemical processes that occur with it in the cooking process, to identify those moments when you can change something in the technology of cooking homemade bread, and which moments in the recipe should be done strictly in steps indicated.
To begin with, the dough does not like to rush. It is thoroughly kneaded. This is done so that the gluten of flour is well dissolved in the liquid part and gain elasticity.
Protein “threads”, binding together, keep gas bubbles formed by the yeast during the processing of sugar and carbohydrates contained in flour - the dough rises due to these bubbles.
The second important point: fermentation is an enzymatic process. Yeast is added to the dough not only for the formation of bubbles! But most housewives forget about it, try to save time by choosing the fastest recipe for homemade bread or other pastries. In a well-fermented dough useful acids are formed, converted from carbohydrates, which are the main problem in the fight against excess calories and kilograms.
Do not rush the dough. Try to make bread on sourdough - it is healthier and tastier.
The classic recipe for homemade bread: step by step cooking
Ingredients:
Wheat flour (1 grade) 900 g
High Speed Yeast 11 g
Sugar 40 g
Water 450-500 ml
Vegetable oil 60 g
Salt 7 g
Cooking:
Preparing a soft and lush homemade bread according to the classic recipe is very simple, if you follow the step by step instructions.
1. Heat the water to room temperature and dissolve the yeast and sugar in it, add a cup of flour and mix well. Place the brew in a warm place. The optimum temperature for yeast is 20-25 ° C. The mixture should be doubled, and bubbles will appear on its surface. The time it takes to dissolve the yeast depends on its freshness and the temperature of the water and air in the room. Sugar and flour added to the brew necessarily, because the yeast needs food. To increase the mass faster in volume, add a little oil: the oil film will hold the gas bubbles - the product of yeast processing, thanks to which the rise will be faster. But do not get carried away, because the oil film will also block the access of oxygen, which is also necessary for yeast, like all living organisms.
2. Sift the flour and gradually add it to the liquid, slowly mixing the dough. At this stage it is very important to monitor the density of the dough and the uniform distribution of flour. When it stops flowing, put it on a floured table and continue kneading. The finished bread dough should be flexible, smooth, lump-free and easy to fall behind.
Flour, depending on a number of objective factors, has a different moisture content, therefore, it is necessary to regulate its amount when added to the dough. Here it is important to focus not on the amount indicated in the recipe, but on the tactile sensations, since in the home stop it is extremely difficult to determine the moisture content of the flour.
Dough density for homemade bread should be very high. It will become softer and lush after double proofing, but immediately after kneading it should be similar to the dough for ravioli.
3. Put the dough back into the bowl, cover with a towel or cling film to prevent it from becoming chapped, and put it in a warm place for 1-2 hours. After the time when the dough will increase significantly in size, make a punch. So it will come out of carbon dioxide, which has accumulated during this time. Cover the dough again and let it stand. The dough will double again.
4. You can proceed to the formation of loaves. The total mass of dough for homemade bread, according to the recipe, will be approximately 1.4 kg. The average weight of one loaf is 400-450 g. That is, if you divide 1.4 kg by 450 g (the weight of the finished bread), you get 3 loaves. There is still 100 g of dough - divide this piece into 3 parts too. That is, the mass of each loaf in its raw form will be 483 g. Consider that after baking the mass of bread will decrease by 10-15%, due to evaporation of moisture. The weight of the finished bread at the specified tab will be 400-422 g, in the normal baking mode. It is not desirable to form larger loaves, as this will increase the baking time, and it will be difficult to ensure baking uniformity: a large loaf can remain unbaked inside and burn slightly from above.
5. For hearth bread, form loaves on a table covered with flour, rolling them into tight balls; for pan bread, the dough may be less dense, since it is baked in forms, which is why it retains the desired shape, without spreading during baking.
6. Give the dough a ball shape and place on a baking sheet. Leave to settle for 30-40 minutes, covered with a napkin (not a film!)
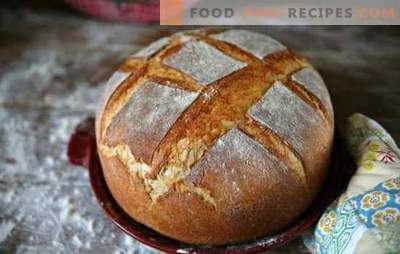
7. Before planting in the oven, the semi-finished products can be greased with vegetable oil to give the bread a beautiful look. If desired, you can decorate the surface with incisions in the form of a grid: for this, use a very thin blade. The depth of the cuts should not be less than 1.5 cm.
8. Preheat the oven to 180 ° C. Baking time at this temperature is about 25-30 minutes for pan bread, for hearth - 18-20 minutes. You can check the readiness with a match - pierce the bread in the middle, if it is ready, it will remain dry.
Until a light crust is formed on the surface of the loaves, do not open the oven so that the dough does not settle due to a sudden change in temperature.
9. Take the finished bread out of the oven and smear it with vegetable oil again so that it has a shiny appearance. Do not put it in polyethylene and do not wrap it until it cools - put it on a wooden surface and cover with a towel for 5-10 minutes.
Step-by-step recipe for homemade wheat and rye bread
In the old days, rye bread was considered not worthy of the nobility and only peasants baked it, but today the situation has changed dramatically. The beneficial properties of rye flour are appreciated, and if you make bread at home, following a step-by-step recipe, it will be even healthier and tastier.
Ingredients:
Rye flour 700 g
Wheat flour 350 g
Dark beer 400 ml
Purified water 200 ml
Brown sugar 4 tbsp. l
Salt 2 tbsp. l Gluten 2 tbsp. l
Raisin 150 g
Caraway
Cooking
1. Take the preparation of the leaven. Pour 3 teaspoons of rye flour into a 1-liter jar, heat 30 ml of water to 35 ° C, add to flour, and mix well. Cover the jar with cling film or a lid and leave it on the table for 24 hours. Make a few holes in the cover or do not close too tightly for air to enter. After a day, add 40 g of flour and water to the jar again, and let stand one more same. The next day, mix already 70 g of flour and 70 ml of water and also leave to ferment on the table. After this time, put the jar in the fridge and add two teaspoons of flour and 20 ml of water for three days. To save time, you can use ready-made sourdough, but it will not give bread such a rich aroma and taste as homemade.
2. Wash the raisins, cover with hot water and leave to get wet.
3. Mix the remaining amount of rye flour with wheat flour and gluten, sift through a sieve into a large bowl and make a well in the middle. When using gluten, always keep clear proportions (for 3 cups of flour you need 15 ml of gluten). Lack or excess of gluten in the dough can spoil the bread.
4. Add to the mixture of flour 1.5 glasses of yeast, sugar, salt and beer. Add the raisins, drain the water, knead the dough until smooth. Make sure there are no lumps in it, and the flour intervened completely. When the dough becomes thick, transfer it from the bowl to the table - it will be much easier to work with it. In the process of kneading lubricate your hands and work surface with oil.
Heat the starter and beer to room temperature before kneading, so that the dough fits better.
5. Return the dough to a bowl and cover with a wrap or towel. Put to approach in a warm place at night.
6. When it rises, give it an oval shape and sprinkle with cumin. Lubricate the baking sheet with butter, using a brush or a napkin, and place a loaf on it. Let the dough stand for half an hour.
7. Warm up the oven to 190-200 ° C, and bake the bread for about 45 minutes. You can check the baking readiness by puncturing it with a match - if it is not wet, the bread is ready. Put the hot bread on a wire rack or wooden surface.
Step-by-step recipes for homemade bread - tips and tricks
Homemade bread is tastier and healthier. To always have a fresh and hot bun for breakfast, of course, you can use a modern bread maker. But not for nothing, since time immemorial, a special relationship has developed to bread - kneading dough with your hands to feel it. It will turn out well - not immediately, but the skill will definitely come.
In the evening, prepare the yeast starter, in deep dishes, so that during the night it “does not run away” to the table. To do this, pour warm water into a bowl, add sugar, yeast and a quarter of the flour required by the recipe. Capacity cover, and leave on the table for the night. For 7-8 hours the yeast will process all the flour and sugar. In the morning, add the rest of the flour, knead the dough, and to speed up the lifting process, move it closer to the heaters. Here you can even use multiware or bread maker, setting the temperature to 22 ° C.
The first secret is that the dough prepared in this way will rise very quickly while breakfast is being cooked, and in 45-50 minutes a fresh, fragrant loaf will lie on the table - over time this skill will work out to automaticity and cooking home-made bread will not seem complicated - every step of a proven recipe will be adjusted in steps!
Second secret: yeast, having fermented well overnight, forms useful enzymes in yeast, which are necessary for the body. After all, flour products harm the figure only because the flour contains a large amount of carbohydrates. Rapid dough preparation does not allow yeast to process carbohydrates and form enzymes. Bread with sourness is very useful.


