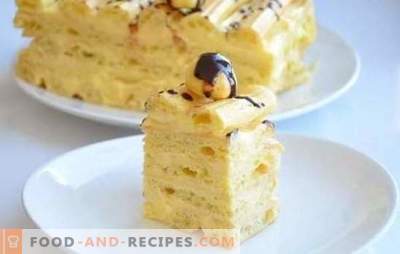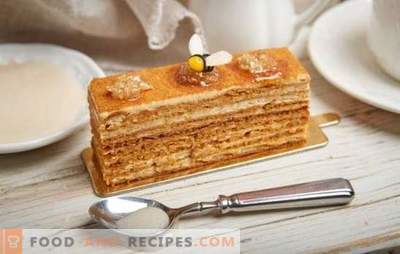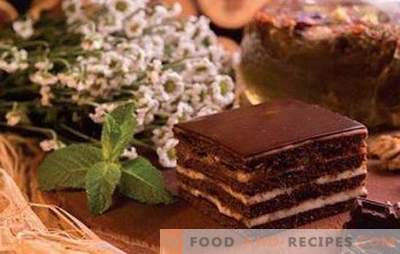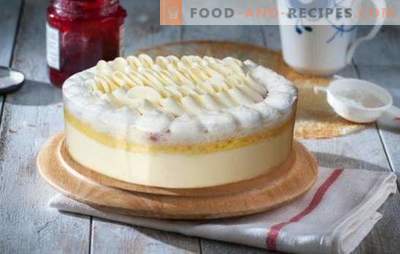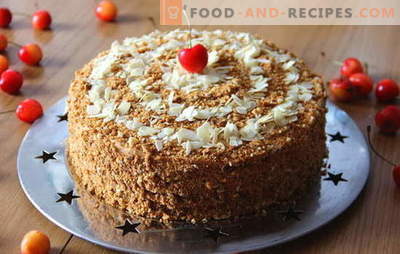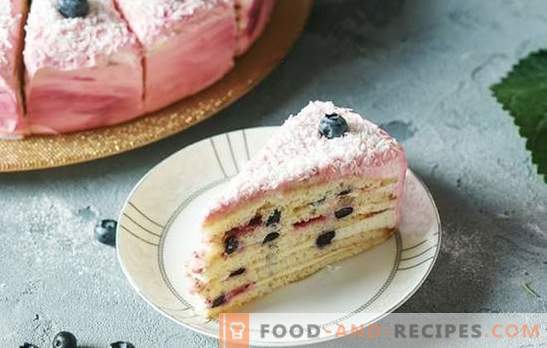
Cake “Milk Girl” is the most suitable option if you want to try something new and tasty. The cake is simple in design, it consists of thin biscuit cakes, which are prepared in just minutes. The dough is kneaded on condensed milk with the addition of eggs and a ripper. It was condensed milk that caused such an unusual name. The recipe is originally from Germany and for the dough local housewives preferred to take the brand of milk concentrate, the name of which in translation sounds like “Dairy Girl”.
We offer two variants of the “Dairy Girl” cake: a step-by-step recipe for a classic dessert with custard and a more complex one: chocolate with butter cream and cherries.
Manufacturing technology of the cake “Milk Girl” (step by step)
• The process of cooking the dough itself is quite simple and does not require effort and excess time. The peculiarity of the process: two mixtures are prepared, dry and liquid, after which they are combined and kneaded until homogeneous. It is not necessary to beat anything for a long time, it is enough to mix, following a certain sequence. The dough should be as homogeneous as possible, and in terms of density it should resemble a thick, home sour cream that did not have time to stand in the cold (as for pancakes).
• Cake “Milk Girl” consists of thin cakes. They are usually cooked in the oven. For this, the dough is spread evenly on parchment, on which a circle of the desired diameter is already drawn. Bake at 200 degrees, until a uniform golden color near the surface of the cake.
• When assembling the cake should be well soaked with a creamy mass. It can be as simple custard or smetannye, and more complex cream, curd, protein cream mass. Impregnation should not be cloying, since the cakes themselves are quite sweet. In the proposed variants of the cake “Milk Girl” step-by-step recipes of two types of cream for such a dessert: a classic custard with a taste of ice cream and the simplest cream. • Making the cake does not require exquisite decor. The main cream mass is usually used, which smooths the sides of the dessert and covers the top. Additionally, the side surfaces sprinkled with crumb from a more dried cake. The top is decorated with patterns or just spread the cream on its surface. Sometimes a cream layer is sprinkled with small chips made from different varieties of chocolate.
Cake “Milk Girl”: a step-by-step recipe with a custard with ice cream flavor
The original version of the cake “Milk Girl”, a step-by-step recipe of this custard to the dessert. Delicate taste of ice cream is achieved by adding butter to cream. The product must be of very high quality, with the highest content of milk fat. When using oils with herbal supplements, the creamy mass will lose in taste.
Ingredients:
• 370 grams of whole condensed milk;
• two eggs;
• wheat flour - 140 gr .;
• 10 gr. ready ripper.
In cream:
• one and a half tablespoons of flour;
• 0.3 liters of milk;
• “Farmerskoe” butter, creamy - 70 g;
• 120 gr. Sahara;
• cream of high fat content - 120 gr.
• two tablespoons of dried fresh starch.
Cooking Method:
1. Prepare the dough for the cake. Pour condensed milk in a spacious bowl. We break eggs to it, we combine components with light beating. In a dry bowl, mix the flour with baking powder, double the mixture and pour it to condensed milk, beat with a whisk, bring to homogeneity. It is not necessary to fill all the flour at once, it is better to add gradually, 1-2 spoons. This makes the process much easier, small portions of flour are easier to stir in the liquid mass and less likely to clump together. In addition, the gradual mixing allows you to control the density of the dough - depending on the quality of flour, its rate may vary. To keep the cakes from spreading over the baking sheet, we need to get the dough thicker than for the pancakes.
2. Take a baking sheet and parchment. Cut off a sheet of paper the size of a roaster from a roll of paper. Now you need to determine the places where we will lay out the dough. If the pan is large, you can bake two cakes on it at a time. So, you need a template, it can be a lid, a plate or the bottom of a metal detachable form, 22 centimeters in diameter. Put the “template” to the paper, draw a contour with a pencil, turn the sheet over and transfer it to the baking sheet. 3. Form cakes. We spread on the center of the circle no more than two spoons of dough. Using a spoon or a wide knife, carefully level, observing the drawn borders. A simpler option: we place a side of a detachable form on a sheet of parchment, which has already been laid with a brazier. We spread two spoons of dough into the center and spread it in a uniform layer, after which we carefully remove the bead.
4. Having established a baking sheet on the average level of the oven heated to 200 degrees, bake the billet in 6-9 minutes (until light browning). Hot cakes are immediately removed from the parchment with a wide spatula, but first we trim the edges. To do this, take a plate of a suitable size, put it on the cake and draw around the circle with the edge of the knife. We transfer the workpiece to the grid or linen towel, save the cut, they are useful for decorating the cake.
5. It happens that due to the poor quality of the paper, the soft cakes are poorly separated. With such a problem, for the following cakes on the parchment it is necessary to thinly apply vegetable oil.
6. Baked cakes laid out on a grid or canvas. It is not recommended to stack the blanks, they can stick together.
7. While the cakes cool down, we begin to prepare the custard with the taste of ice cream. We take out oil from the refrigerator, we cut it and we leave in heat. In a small saucepan pour half a cup of milk. In a cup, mix the starch with the flour, pour the mixture into the milk, stir using a whisk until the dry ingredients disperse, leaving no lumps. Add sugar, add the remaining milk and stir everything well again. This time we try to dissolve the sugar crystals as best we can. Place the saucepan on the “slow” heating and, stirring continuously, boil cream. As soon as the first signs of boiling appear, make the fire a little less and continue cooking until the cream thickens. It is important not to digest, the hot cream base should be rarely, it will become thicker when cooled.
8. Cool the choux to a warm state. Add time to melt the oil by this time and, vigorously stirring in a circle, bring to homogeneity. Leave to complete cooling. Pour cold cream into a clean, dry bowl with a mixer, starting at reduced speed and gradually increasing the speed, whip to a fluffiness. It is important fat content of cream and their temperature. Only a well-cooled, high-fat product can be whipped qualitatively. A quarter of an hour before beating, move the package of cream from the “warm” chamber of the refrigerator to the freezer. Many cooks recommend to determine the same bowl for whipping and whips mixer. 9. We spread the thick creamy mass to the cooled brewed base and mix thoroughly. The cream will be ready when it acquires the characteristic smoothness.
10. Build a cake. Putting one cake on a plate, put a portion of cream on it. Behind him we lay the next one, generously grease him. Repeat until all blanks are gone. Do not save on the cream - cakes should be well soaked. We cover with the same cream the topmost cake, we also level the sides of the dessert with it.
11. Getting to the design. The remaining pieces are cracked into smaller pieces and lightly dried in a pan or in the oven. After having cooled well, we grind the biscuit pieces with our hands into the crumb. If there is a blender, it is better to use it - the process will go faster and the baby will turn out smaller. Sprinkle the sides of the cake with crumbled biscuit, put the rest of the cream in the pastry syringe and decorate the top.
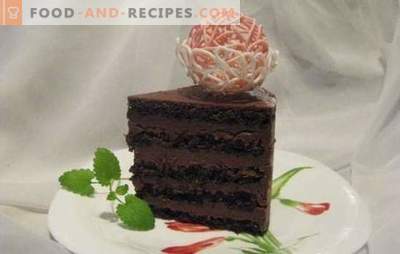
Chocolate version of the cake “Milk Girl”: a step-by-step recipe with butter cream and cherry
Step-by-step recipe for cake “Milk Girl” with chocolate dough cake and butter cream. Cherry is used for the top cream layer, the cake is made with grated chocolate. Powder cocoa is used to color the dough.
Ingredients:
• bank of whole condensed milk;
• two large eggs;
• ready dough ripper - 15 gr .;
• 40 gr. natural cocoa powder;
• half a cup of flour.
For cream:
• 600 gr. cream, with a fat content not lower than 35%;
• 6 tablespoons of unrefined sugar;
• one gram of vanilla powder.
Additionally:
• 350 gr. pitted cherries;
• granulated gelatin - 3 gr .;
• 50 gr. dark chocolate
Cooking Method:
1. After pouring out the flour in a dry bowl, add powdered cocoa and baking powder. Mix thoroughly, seeding the mixture through a rare sieve. This will allow to saturate it with air and relieve random impurities.
2. Break eggs into a spacious container, add condensed milk and slightly beat. No need to bring the egg-milk mass to foaming, it is enough to obtain a homogeneous mixture. Combine the flour mixture with the liquid base, introduce gradually, pouring one or two spoons, and mixing well after that. In total, the dough should turn out, in density as for making a pancake. Cocoa, as a rule, thickens the dough, and therefore the gradual addition of the flour mixture is the best way to adjust its thickness. 3. As in the previous step-by-step recipe for the “Dairy Girl” cake, we draw circles on parchment paper and line the baking sheet with it. We spread on the center two spoons of dough, smear it well, without going beyond the delineated boundaries. At first glance, its amount may seem insufficient, but it is not. When baking, the dough rises well, the cakes will not be too thin.
4. We bake at 200 degrees, the time depends on the power of the oven and on average can take from six to ten minutes. By color, it is difficult to determine readiness, because the dough is dark. Before you get a baking sheet, check the cake, slightly pressed with your fingertips. It should be soft and slightly springy.
5. Remove the hot chocolate cakes from the paper with a wide spatula and lay them on the grill, cool. It is not necessary to fold with a pile, they may accidentally stick together.
6. Cooked servings of dough should be sufficient for at least eight cakes, 22 cm diameter. It is advisable to dry the last piece a little, it will be necessary for decorating the cake. From it you will need to make a crumb, and a soft cake will not crumble.
7. Cooking cream. The peculiarity of cooking cream in cream temperature, they must be well cooled. For high-quality whipping, their fat content is also important, the lower it is, the less chance there is to get a high-quality cream.
8. The capacity in which the cream will be prepared, it is desirable to cool. We place it for ten minutes in a freeze, we also put the whips of the mixer. After cooling, pour the cream into a bowl and start to beat at low speed. As soon as they begin to increase in volume and thicken, we begin to pour the icing sugar, and increase the speed of the mixer. We control the density of butter cream - when raising the rims, the creamy mass should rise behind them and not fall off.
9. Prepare the cherry. If these are fresh berries, after removing the seeds, blanch them a little with a little sugar to soften. Then we recline on a colander and leave it in it. Berries should dry well. Frozen cherries also blanch, but only after complete thawing, canned, just enough to dry. 10. Prepare gelatin, its granules should swell well, for which purpose we fill with cool water and leave in it.
11. Putting dessert. In this version, the “Dairy Girl” cake is better to be assembled in detachable form or used for assembling its side. Alternately, stacking each other, richly grease the skin with butter cream. Top cake not use.
12. Measure out two tablespoons of cream and place in a small bowl. The remaining cream mass is divided in half. Part of it will go to the alignment of the sides, and the other on the decoration of the top of the cake.
13. Bowl with swollen gelatin is lowered into the “water bath” container. Warm up, continuously stirring, until complete dissolution. Slightly cool the gelatinous mass and mix it with the cream set aside in a bowl. Put the prepared mixture into one of the cream bowls. Mix it well, pour it onto the upper surface of the cake, smooth it out. Spread dried cherries evenly and gently press them down. Put the cake for an hour in the “warm” compartment of the refrigerator or for half an hour in the freezer.
14. Having waited for the top layer to solidify, we proceed to further decorating the cake: carefully remove the sides, level the sides with the remaining cream, break the dried cake layer and interrupt with a blender. Sprinkle the cream layer on the sides with cooked crumbs, and sprinkle the top with small chocolate chips.
Tricks for making a “Dairy Girl” cake using step-by-step recipes - useful tips
• The batter is universal, cakes from it can be baked not only in the oven, but also in the pan. This technique has a small nuance: the pan should be thick-walled, up to 22 cm in diameter, but no more. Before baking, its bottom should be well moistened with oil, and the heat of the burner should be slightly higher than the minimum. Multicooker can also be a good helper. The principle of applying the dough to the bottom of the cooking bowl is the same as for parchment, the cake layers are prepared in five minutes in the “Baking” program.
• There are a lot of dessert options, but they are all based on the basic step-by-step recipes of the “Milk Girl” cake. The dough composition, mixing sequence and baking method are unchanged. A new taste is achieved by peeling the cream with fruits or berries, using various creams.
